 从0开始搭建一套规范的Vue3.x项目工程环境
# 从0开始搭建一套规范的Vue3.x项目工程环境
[TOC]
搭建一套规范的Vite + Vue3 + TypeScript前端工程化项目环境。
本篇将从一下几个方面展开:
- 架构搭建
- 代码规范
- 提交规范
# 技术栈
- 编程语言:TypeScript 4.x + JavaScript
- 构建工具:Vite 2.x
- 前端框架:Vue 3.x
- 路由工具:Vue Router 4.x
- 状态管理:Vuex 4.x
- UI框架:Element Plus / Vant 3.x
- HTTP工具:Axios
- Git Hook 工具:husky + lint-staged
- 代码规范: EditorConfig + Prettier + ESLint + Airbnb JavaScript Style Guide
- 提交规范:Commitizen + Commitlint
# 架构搭建
请确保你的电脑上成功安装Node.js,本项目使用Vite构建工具,需要Node.js版本>=12.x。
查看Node.js版本:
node -v
使用nvm将Node.js升级到最新的稳定版本:
nvm install stable
# 使用Vite快速初始化项目雏形
- NPM:
npm init @vitejs/app
- Yarn
yarn create @vitejs/app
然后按照终端提示完成以下操作:
- 输入项目名称
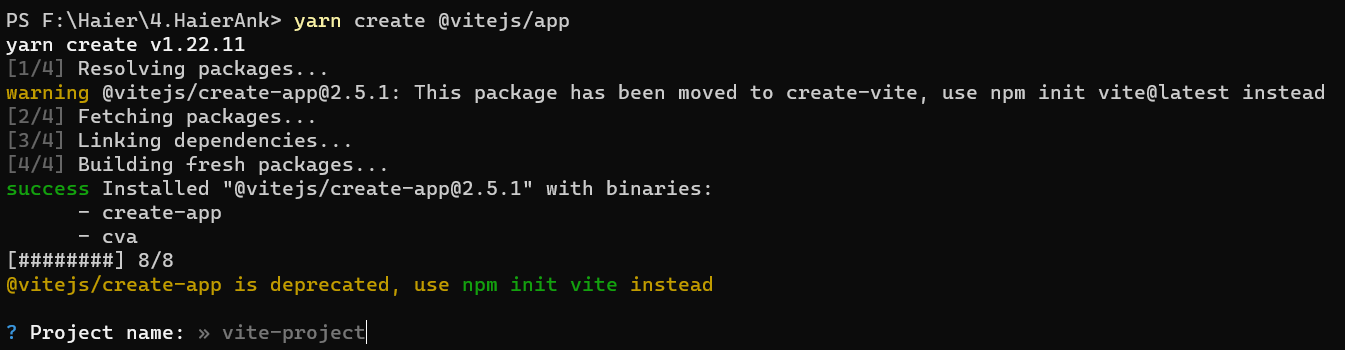
选择模板
先选择
vue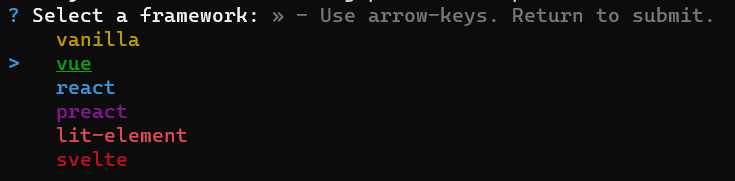
再选择
vue-ts

还可以通过附加的命令行选项直接指定项目名和模板,本项目要构建 Vite + Vue3 + TypeScript 项目,则运行:
# npm 6.x
npm init @vitejs/app vite-vue3-starter --template vue-ts

# npm 7+(需要额外的双横线)
npm init @vitejs/app vite-vue3-starter -- --template vue-ts

# yarn
yarn create @vitejs/app vite-vue3-starter --template vue-ts
2
3
4
5
6
7
8
9
- 进入项目安装依赖
- NPM:
cd xxx
npm install
2
- Yarn:
cd xxx
yarn
2
- 在项目中使用yarn 2.x版本
yarn set version berry
"Berry" 是 Yarn 2 发布序列的代号
- 运行项目
- NPM:
npm run dev
- Yarn:
yarn run dev
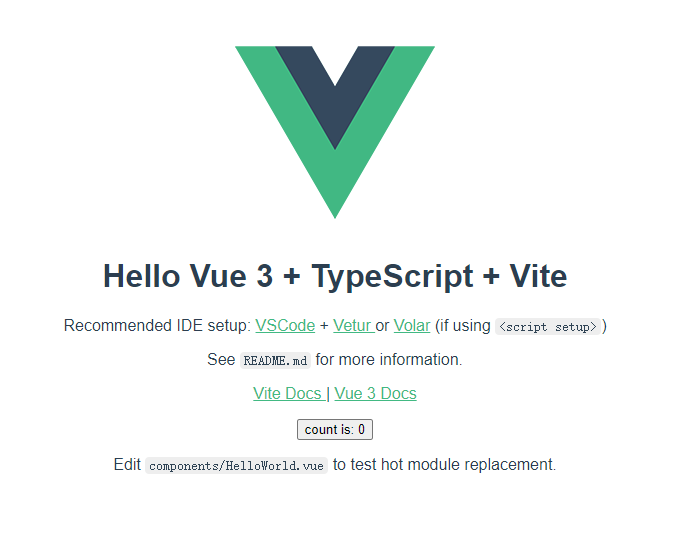
如上图,表示 Vite + Vue3 + TypeScript 简单的项目骨架搭建完毕,下面我们来为这个项目集成 Vue Router、Vuex、Element Plus、Axios、Stylus/Sass/Less。
# 修改Vite配置文件vite.config.ts
Vite的配置文件vite.config.ts位于根目录下,项目启动时会自动读取```vite.config.ts``的配置信息。
关于 Vite 更多配置项及用法,请查看 Vite 官网 (opens new window)
- 基础配置(设置
@指向src目录、 服务启动端口、打包路径、代理等):
import { defineConfig } from 'vite'
import vue from '@vitejs/plugin-vue'
// 如果编辑器提示 path 模块找不到,则可以安装一下 @types/node -> npm i @types/node -D
import { resolve } from 'path'

// https://vitejs.dev/config/
export default defineConfig({
  plugins: [vue()],
  resolve: {
    alias: {
      '@': resolve(__dirname, 'src') // 设置 `@` 指向 `src` 目录
    }
  },
  base: './', // 设置打包路径
  server: {
    port: 4000, // 设置服务启动端口号
    open: true, // 设置服务启动时是否自动打开浏览器
    cors: true // 允许跨域

    // 设置代理,根据我们项目实际情况配置
    // proxy: {
    //   '/api': {
    //     target: 'http://xxx.xxx.xxx.xxx:8000',
    //     changeOrigin: true,
    //     secure: false,
    //     rewrite: (path) => path.replace('/api/', '/')
    //   }
    // }
  }
})
2
3
4
5
6
7
8
9
10
11
12
13
14
15
16
17
18
19
20
21
22
23
24
25
26
27
28
29
30
31
- 增加了环境变量配置:
import { defineConfig, loadEnv } from 'vite'
import vue from '@vitejs/plugin-vue'
// 如果编辑器提示 path 模块找不到,则可以安装一下 @types/node -> npm i @types/node -D
import { resolve } from 'path'

// https://vitejs.dev/config/
export default ({ mode }) => {
  return defineConfig({
    plugins: [vue()],
    resolve: {
      alias: {
        '@': resolve(__dirname, 'src') // 设置 `@` 指向 `src` 目录
      }
    },
    base: './', // 设置打包路径
    server: {
      host: '0.0.0.0', // 解决项目启动后use `--host` to expose没有将f
      port: 4000, // 设置服务启动端口号
      open: true, // 设置服务启动时是否自动打开浏览器
      cors: true // 允许跨域

      // 设置代理,根据我们项目实际情况配置
      // proxy: {
      //   '/api': {
      //     target: loadEnv(mode, process.cwd()).VITE_APP_WEB_URL,
      //     changeOrigin: true,
      //     secure: false,
      //     rewrite: (path) => path.replace(/^\/api/, '/api')
      //   }
      // }
    }
  })
}
2
3
4
5
6
7
8
9
10
11
12
13
14
15
16
17
18
19
20
21
22
23
24
25
26
27
28
29
30
31
32
33
# 规范目录结构
├── publish/
└── src/
    ├── assets/                    // 静态资源目录
    ├── common/                    // 通用类库目录
    ├── components/                // 公共组件目录
    ├── router/                    // 路由配置目录
    ├── store/                     // 状态管理目录
    ├── style/                     // 通用 CSS 目录
    ├── utils/                     // 工具函数目录
    ├── views/                     // 页面组件目录
    ├── App.vue
    ├── main.ts
    ├── shims-vue.d.ts
├── tests/                         // 单元测试目录
├── index.html
├── tsconfig.json                  // TypeScript 配置文件
├── vite.config.ts                 // Vite 配置文件
└── package.json
2
3
4
5
6
7
8
9
10
11
12
13
14
15
16
17
18
19
# 集成路由工具Vue Router
- 安装支持Vue3的路由工具 vue-router@4
- NPM:
npm i vue-router@4
- Yarn:
yarn add vue-router@4
- 创建
src/router/index.ts路由配置文件
在 src 下创建 router 目录,然后在 router 目录里新建 index.ts 文件:
 └── src/
     ├── router/
         ├── index.ts  // 路由配置文件
2
3
src/router/index.ts:
import {
    createRouter,
    createWebHashHistory,
    RouteRecordRaw
  } from 'vue-router'
  import Home from '@/views/Home/index.vue'

  const routes: Array<RouteRecordRaw> = [
    {
      path: '/',
      name: 'Home',
      component: Home
    },
    {
      path: '/about',
      name: 'About',
      component: () => import('@/views/About/index.vue') // 懒加载组件
    }
  ]

  const router = createRouter({
    history: createWebHashHistory(),
    routes
  })

  export default router
2
3
4
5
6
7
8
9
10
11
12
13
14
15
16
17
18
19
20
21
22
23
24
25
26
- 在
main.ts文件中挂载路由配置
import { createApp } from 'vue'
import App from './App.vue'

import router from './router/index'

createApp(App).use(router).mount('#app')
2
3
4
5
6
# 集成状态管理工具Vuex
- 安装支持Vue3的状态管理工具vuex@next
- NPM:
npm i vuex@next
- Yarn:
yarn add vuex@next
- 创建
src/store/index.ts文件
在 src 下创建 store 目录,然后在 store 目录里新建 index.ts 文件:
└── src/
    ├── store/
        ├── index.ts  // store 配置文件
2
3
src/store/index.ts:
import { createStore } from 'vuex'

const defaultState = {
  count: 0
}

// Create a new store instance.
export default createStore({
  state() {
    return defaultState
  },
  mutations: {
    increment(state: typeof defaultState) {
      state.count += 1
    }
  },
  actions: {
    increment(context) {
      context.commit('increment')
    }
  },
  getters: {
    double(state: typeof defaultState) {
      return 2 * state.count
    }
  }
})
2
3
4
5
6
7
8
9
10
11
12
13
14
15
16
17
18
19
20
21
22
23
24
25
26
27
- 在
main.ts文件中挂载 Vuex 配置
import { createApp } from 'vue'
import App from './App.vue'
import router from './router/index'
import store from './store/index'

createApp(App).use(router).use(store).mount('#app')
2
3
4
5
6
# 按需引入UI框架 Element Plus
- 安装Element Plus
- NPM:
npm install element-plus --save
- Yarn:
yarn add element-plus
安装 babel-plugin-import
借助 babel-plugin-import (opens new window),我们可以只引入需要的组件,以达到减小项目体积的目的。
$ npm install vite-plugin-style-import -D
或者
$ yarn add vite-plugin-style-import -D
- 在
main.ts中引入.scss样式
import 'element-plus/packages/theme-chalk/src/base.scss'
- 修改
vite.config.js
import { defineConfig } from 'vite'
import vue from '@vitejs/plugin-vue'
import styleImport from 'vite-plugin-style-import'

export default defineConfig({
  plugins: [
    vue(),
    styleImport({
      libs: [{
        libraryName: 'element-plus',
        esModule: true,
        ensureStyleFile: true,
        resolveStyle: (name) => {
          const theName = name.slice(3)
          return `element-plus/packages/theme-chalk/src/${theName}.scss`
        },
        resolveComponent: (name) => {
          return `element-plus/lib/${name}`;
        },
      }]
    })
  ]
})
2
3
4
5
6
7
8
9
10
11
12
13
14
15
16
17
18
19
20
21
22
23
- 在
main.ts中全局引用组件
import { createApp } from 'vue'
import { ElButton, ElSelect } from 'element-plus';
import App from './App.vue';
// 如果要使用.scss样式文件,则需要引入base.scss文件
// import 'element-plus/packages/theme-chalk/src/base.scss'

const app = createApp(App)
app.component(ElButton.name, ElButton);
app.component(ElSelect.name, ElSelect);

/* or
 * app.use(ElButton)
 * app.use(ElSelect)
 */

app.mount('#app')
2
3
4
5
6
7
8
9
10
11
12
13
14
15
16
- 在页面内单独引用组件
<template>
	<el-button>test</el-button>
</template>
<script lang="ts">
    import { defineComponent } from 'vue'
    import { ElButton } from 'element-plus'
    export default defineComponent({
        components: {
            [ElButton.name]:ElButton
        }
    })
</script>
2
3
4
5
6
7
8
9
10
11
12
# 集成HTTP工具Axios
- 安装Axios (Axios跟Vue的版本没有直接关系,安装最新版本即可)
- NPM:
npm i axios
- Yarn:
yarn add axios
- 配置Axios
为了使项目的目录结构合理且规范,我们在src下创建utils目录来存储我们常用的工具函数
Axios作为HTTP工具,我们在utils目录下创建request.ts作为Axios配置文件:
└── src/
    ├── utils/
        ├── request.ts  // Axios 配置文件
2
3
import Axios from 'axios'
import { ElMessage } from 'element-plus'

// 如果是开发环境不设置baseUrl使用代理处理跨域,
const baseURL =
  <string>import.meta.env.MODE === 'development' ? '' : <string>import.meta.env.VITE_APP_WEB_URL

const axios = Axios.create({
  baseURL,
  timeout: 20000 // 请求超时 20s
})

// 前置拦截器(发起请求之前的拦截)
axios.interceptors.request.use(
  (response) => {
    /**
     * 根据你的项目实际情况来对 config 做处理
     * 这里对 config 不做任何处理,直接返回
     */
    return response
  },
  (error) => {
    return Promise.reject(error)
  }
)

// 后置拦截器(获取到响应时的拦截)
axios.interceptors.response.use(
  (response) => {
    /**
     * 根据你的项目实际情况来对 response 和 error 做处理
     * 这里对 response 和 error 不做任何处理,直接返回
     */
    return response
  },
  (error) => {
    if (error.response && error.response.data) {
      const code = error.response.status
      const msg = error.response.data.message
      ElMessage.error(`Code: ${code}, Message: ${msg}`)
      console.error(`[Axios Error]`, error.response)
    } else {
      ElMessage.error(`${error}`)
    }
    return Promise.reject(error)
  }
)

export default axios
2
3
4
5
6
7
8
9
10
11
12
13
14
15
16
17
18
19
20
21
22
23
24
25
26
27
28
29
30
31
32
33
34
35
36
37
38
39
40
41
42
43
44
45
46
47
48
49
- 使用Axios
<template></template>
<script lang="ts">
  import { defineComponent } from 'vue'
  import request from '../utils/axios'

  export default defineComponent({
    setup() {
      request
        .get('/users/XPoet')
        .then((res) => {
          console.log('res: ', res)
        })
        .catch((err) => {
          console.log('err: ', err)
        })
    }
  })
</script>
2
3
4
5
6
7
8
9
10
11
12
13
14
15
16
17
18
# 集成 CSS 预编译器 Stylus/Sass/Less
- 安装
- NPM:
npm i stylus -D
npm i sass -D
npm i less -D
2
3
- Yarn:
yarn add stylus --dev
yarn add sass --dev
yarn add less --dev
2
3
- 使用
<style lang="scss">
  ...
</style>
2
3
# 代码规范(EditorConfig + Prettier + ESLint)
# 集成 EditorConfig 配置
EditorConfig 有助于为不同 IDE 编辑器上处理同一项目的多个开发人员维护一致的编码风格。
在项目根目录下增加 .editorconfig 文件:
# Editor configuration, see http://editorconfig.org

# 表示是最顶层的 EditorConfig 配置文件
root = true

[*] # 表示所有文件适用
charset = utf-8 # 设置文件字符集为 utf-8
indent_style = space # 缩进风格(tab | space)
indent_size = 2 # 缩进大小
end_of_line = lf # 控制换行类型(lf | cr | crlf)
trim_trailing_whitespace = true # 去除行首的任意空白字符
insert_final_newline = true # 始终在文件末尾插入一个新行

[*.md] # 表示仅 md 文件适用以下规则
max_line_length = off
trim_trailing_whitespace = false
2
3
4
5
6
7
8
9
10
11
12
13
14
15
16
# 集成 Prettier 配置
Prettier 是一款强大的代码格式化工具,支持 JavaScript、TypeScript、CSS、SCSS、Less、JSX、Angular、Vue、GraphQL、JSON、Markdown 等语言,基本上前端能用到的文件格式它都可以搞定,是当下最流行的代码格式化工具。
- 安装 Prettier
- NPM:
npm i prettier -D
- Yarn:
yarn add prettier --dev
- 创建 Prettier 配置文件
.prettierrc
{
  "useTabs": false,
  "tabWidth": 2,
  "printWidth": 100,
  "singleQuote": true,
  "trailingComma": "none",
  "bracketSpacing": true,
  "semi": false
}
2
3
4
5
6
7
8
9
- Prettier 安装且配置好之后,就能使用命令来格式化代码
# 格式化所有文件(. 表示所有文件)
2
# 集成 ESLint 配置
ESLint (opens new window) 是一款用于查找并报告代码中问题的工具,并且支持部分问题自动修复。其核心是通过对代码解析得到的 AST(Abstract Syntax Tree 抽象语法树)进行模式匹配,来分析代码达到检查代码质量和风格问题的能力。
- 安装 ESLint(推荐只在当前项目中安装)
- NPM:
npm i eslint -D
- Yarn:
yarn add eslint --dev
- 配置 ESLint
ESLint 安装成功后,执行 npx eslint --init,然后按照终端操作提示完成一系列设置来创建配置文件。
- How would you like to use ESLint?(你想如何使用 ESLint?)